
Lactate Testing Essentials
Everything You Need In One Location


Our goal is to put everything you need in one place. If we’ve missed something, or if you have additional questions… please reach out and let us know.
For quick reference, here’s the outline.
Submax
Full Profile
VO2max
We are going to assume everything contained in Chapter 4, Training Zone Essentials.
Look for an upcoming seminar on our YouTube Channel that explains application of this chapter.
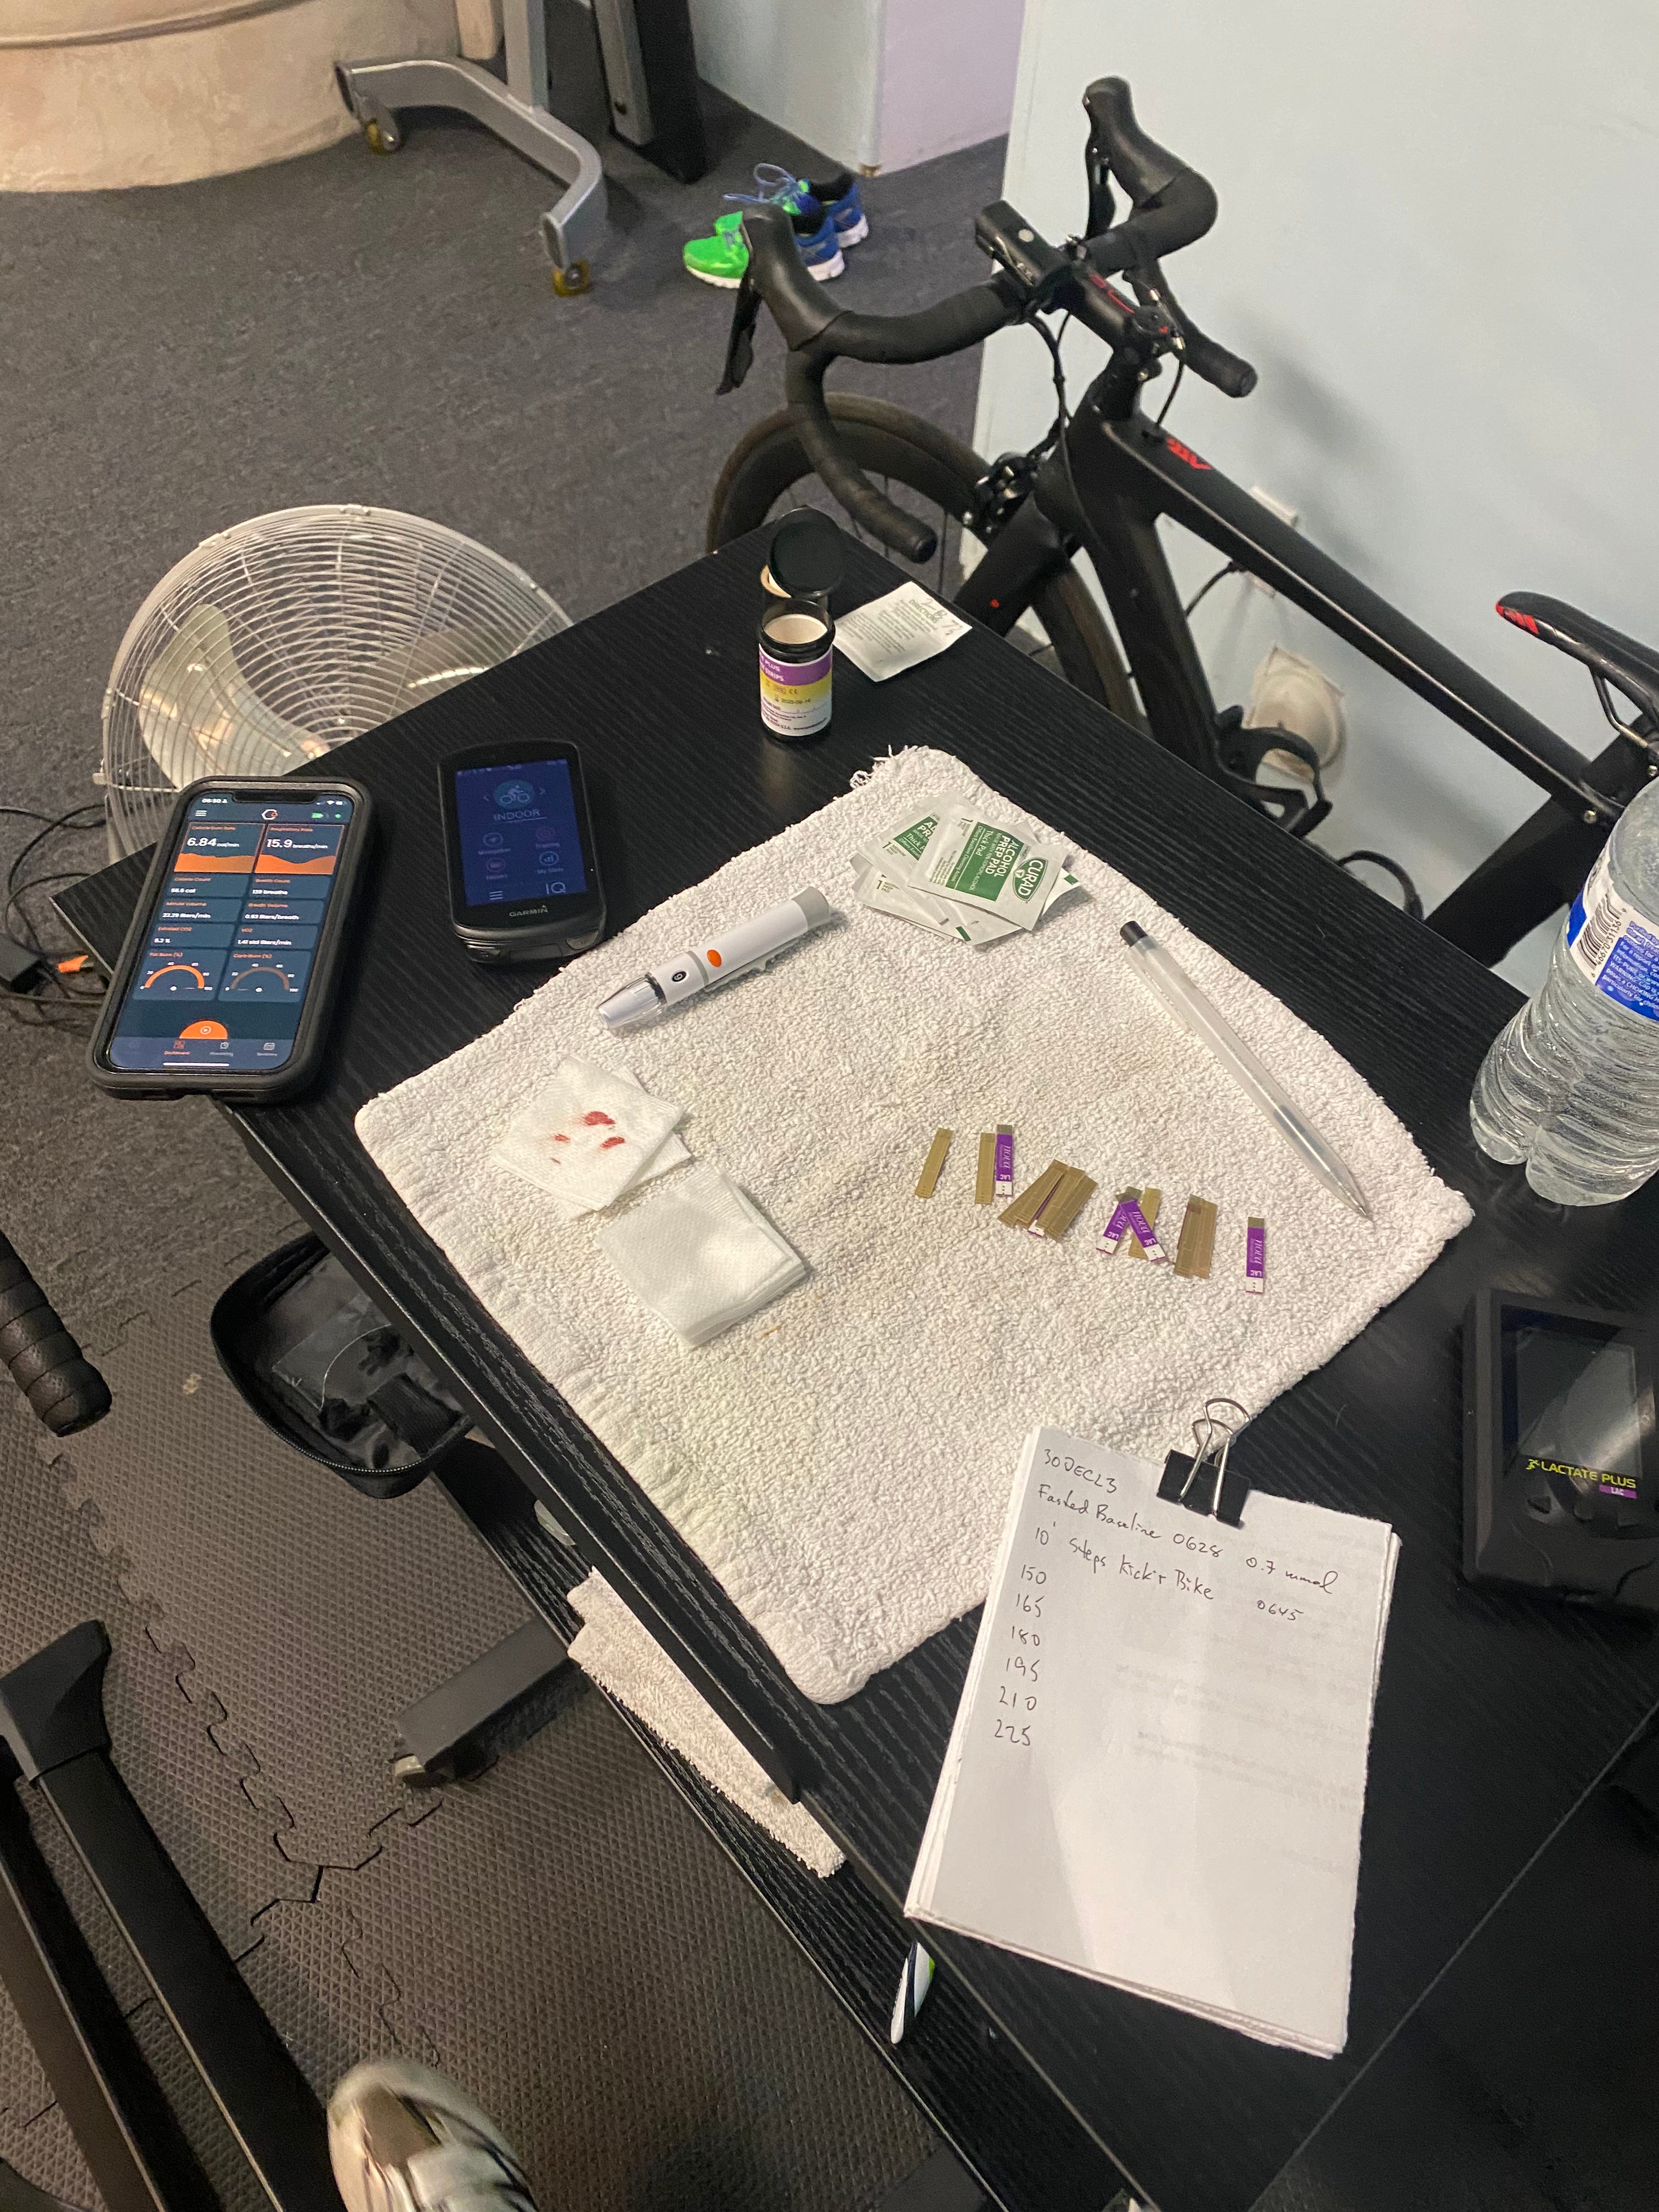
Gear
Lactate Analyzer - we use the Lactate Plus Meter. It samples the blood drop from the tip of the strip and has a 13-second analysis time. This makes sampling easy and enables a quick re-check if data is suspect.
Lactate Strips - provided by the same company making the analyzer. Always make sure you have double the strips you expect to need.
Heart Rate Strap - we use a Polar H10 strap.
Data Capture Device - Bike computer, smart watch or a web-based app like Zwift.
Note Pad - A back-up to the device(s) and where you will note RPE, lactate and other data. For each step, note:
Max heart rate
Marks out of 5 for RPE, corresponding to Zones 1 to 5, half marks allowed. Note RPE in the final minute of each step.
Breathing changes
Athlete comments about ease of movement
Lance - most the lancets supplied are sized too small to get a good drop of blood. If you are having issues with sample contamination then size up the lancet.
Pressure activated safety lancets are excellent when testing groups. They are single use and eliminate the risk of cross-contamination.
For self-testing, consider 28-gauge sterile lancets.
Dental Gauze - while you could use wipes or towels, dental gauze works well.
Rubber Gloves & Biohazard Waste Bags - check with your local municipality for rules covering the disposal of sharps and blood waste. No gloves are required if self-testing. Experienced, qualified testers can use the no-touch technique avoiding contact between the athlete’s blood and the skin of the tester.
Spare Towels & Alcohol Wipes - sweat has a much higher lactate content than blood. Keep the testing area, and the test site as clean as possible. This becomes challenging as work rate increases and if the athlete is a heavy sweater.
Certain practitioners (John, for example) prefer using a dry towel to clean the area before each sample.

 | A guest post by
|