

In Part One I outlined two gears for your endurance work:
Easy: to adapt from prior training.
Steady: to provide a new stimulus.
We dialed in those efforts using two progressive workouts. The first was a 60-minute session and the second was a 90-minute session.
Where To Focus?
Most the concerns we have are about “how intense.” A better question to ask is “how much.” One of the best things about cycling is our ability to tolerate a lot of volume.
Focus on long-term volume. Within your week, build up your longest ride. If you don’t have the time for a weekly long ride then go long at least once a month.
With your long ride…
Runners: Racing up to the marathon, build your long ride up to the duration of your race.
Triathletes: Racing up to 70.3 events, build your long ride up to the duration of your race. For my thoughts on Ironman racing please see my Guide to Going Long, specifically the Bike Section of Part Two.
Cyclists & Everyone Else: Have a read of What’s It Going To Take inside our Bike Chapter.
At first, your endurance rides should be Easy.
As fitness improves, insert blocks of Steady. Patterns such as 12 out of every 15 minutes, 20 out of every 30 minutes and/or 40 out of every 60 minutes work well.
As you insert blocks of Steady, and extend the duration, you will see why aiming around LT1 is appropriate. You’ll get enough fatigue to trigger an adaptation but (hopefully) not so much that your training week is disrupted.
It really is that simple. When it comes to volume-driven adaptations, there are no shortcuts.
Zones 3 and 4
With your Green Zone dialed, figuring out Zones 3 and 4 is straightforward.
Place a progressive set at the end of a Green Zone workout.
As it says in the picture.
Sit on LT1/Steady effort for 1 to 2 hours.
That’s your warm-up and an excellent test if you’ve set your Green Zone appropriately.
The fitness required for a 1-2 hour “warm-up” is a prerequisite for using the Tempo & Torque workouts in our Bike Chapter.
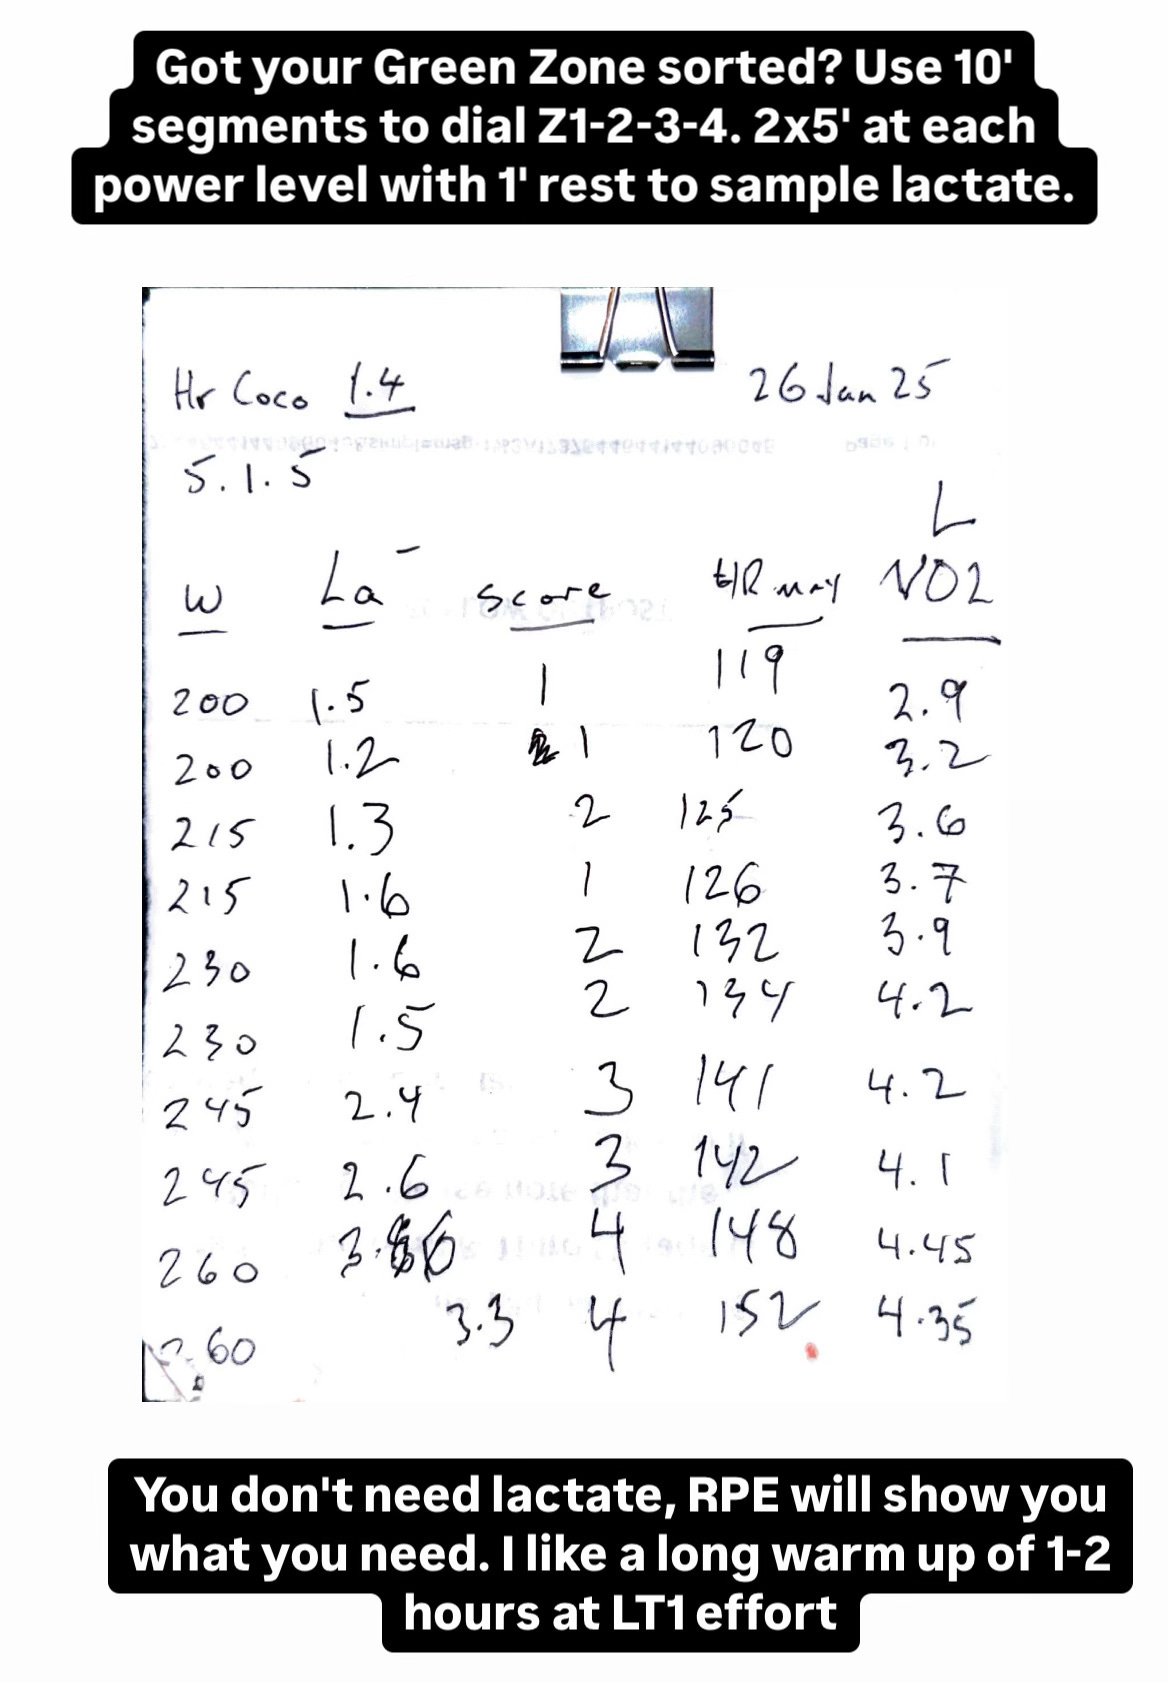
Using 10-minute segments, progress gradually from LT1 effort up through your zones. This time ending in Zone 4.
On the original test in Part One, I recommended 25w steps (for most). For this set, use smaller steps to get a feel for your zone transitions (I used 15w).
I split the 10-minute segments in half to sample lactate every five minutes. I was getting 1 minute of rest after each 5-minute segment.
As we explained in the Lactate Chapter, different protocols produce different kinetics. Meaning our RPE, heart rate and lactate profiles will change with step height, step duration and rest intervals.
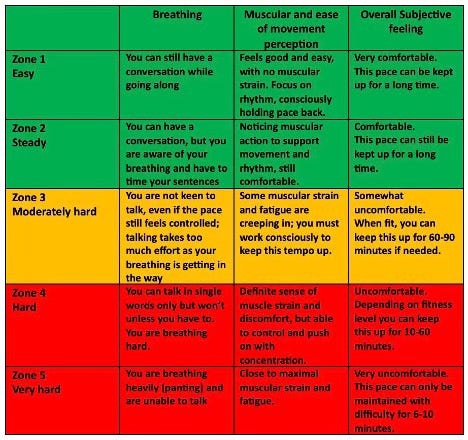
I find the most useful subjective marker is breathing. Across the entire range (in my progressive set above), there was no discomfort and little fatigue. What I experienced was an increasing sensation of work and a rising breathing rate.
Across three workouts, we’ve built Zones 1 through 4. If you’ve been capturing heart rate data, you should have a clear idea of your normal heart rate profile for each effort.
Next time, I’ll explain how to use all this information to manage fatigue in your races as well as on group rides. Being strong at the end will require overcoming some hardwired survival instincts.
Back to Table of Contents
Hello Gordo! I wanted to ask you how would you approach an athlete with a linear lactate profile. Would you set the Green zone by RPE? Thanks!